Melt Away Yummies

How can you resist the name of this cookie recipe, Melt Away Yummies? I couldn’t, so I just had to make them! When finished, I had tons of small round disk cookies about 1 inch in diameter. They have a rich and buttery flavor with a hint of almond. “Yummy” like the name says! I am glad the instructions say to “decorate as desired” at the end of the recipe, because that is where you can be super creative and these cookies can really come alive and sparkle!
I do like the idea of being creative when baking…but when you are following a recipe, you don’t always get the opportunity to bring in much creativity. In this case, I followed the recipe as written, I made sure the creativity came in with the decorating! I rated the Melt Away Yummies cookie recipe 3-stars because of the multiple steps and the added decorating and creativity option.
In my Mint Melt Away blog post, I mentioned that I had a lot of frosting left over. I made these Melt Away Yummies just a few days after making the Mint Melt Aways, so I used the pink and white left-over frosting to decorate these yummy little gems and turn them into Valentine’s Day specials. As I started to decorate, the Mint Melt Away frosting was a bit difficult to control with such small cookies because it was a bit loose or thin, but it dried and set up so nicely, it ended up working great! There is a nice shine to each cookie which really draws your attention. And adding the sprinkles was the perfect touch to turn them into fancy Valentine’s Day cookies that look great and will sweeten any Valentine’s day 🙂
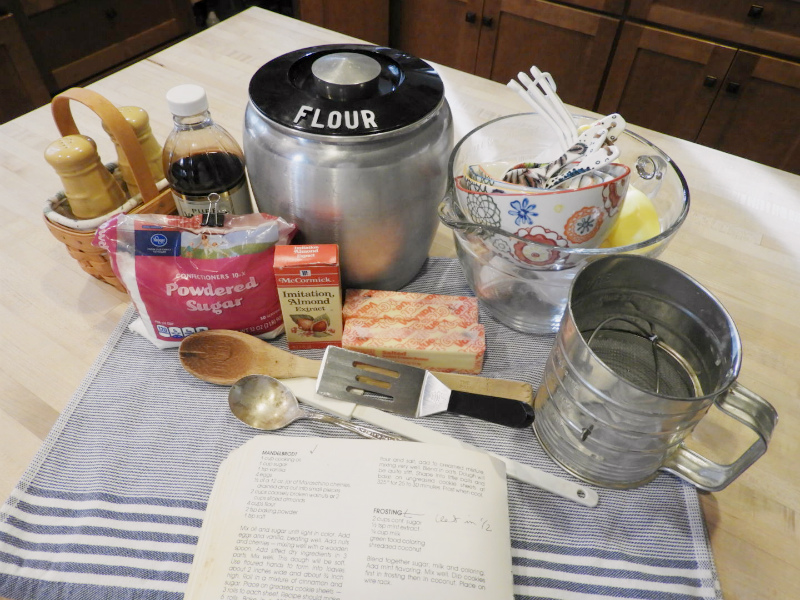
I got started after getting organized and gathering all my ingredients together.
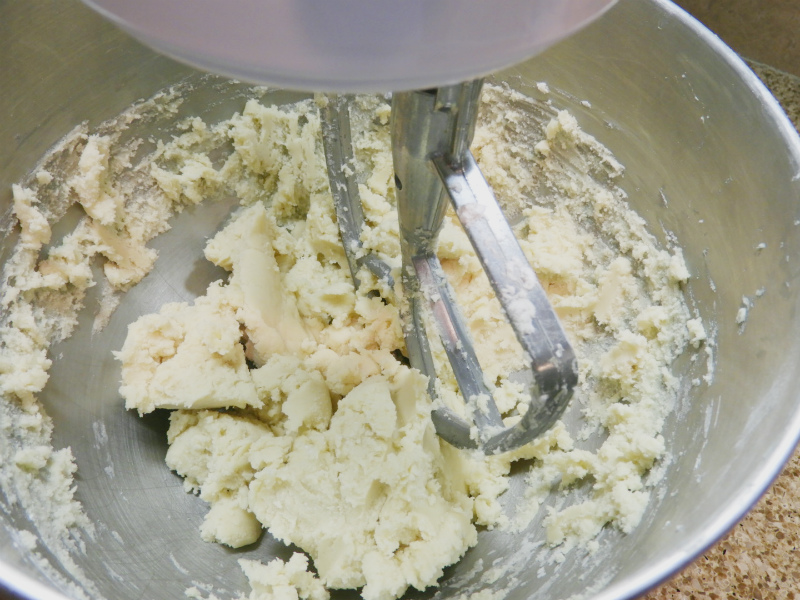
The cookie dough came together nicely with the powdered sugar. The recipe calls for minimal liquid, so the dough was a bit dry. This was perfect because it made it easy to handle and shape the rolls after chilling the dough in the refrigerator for a short while.
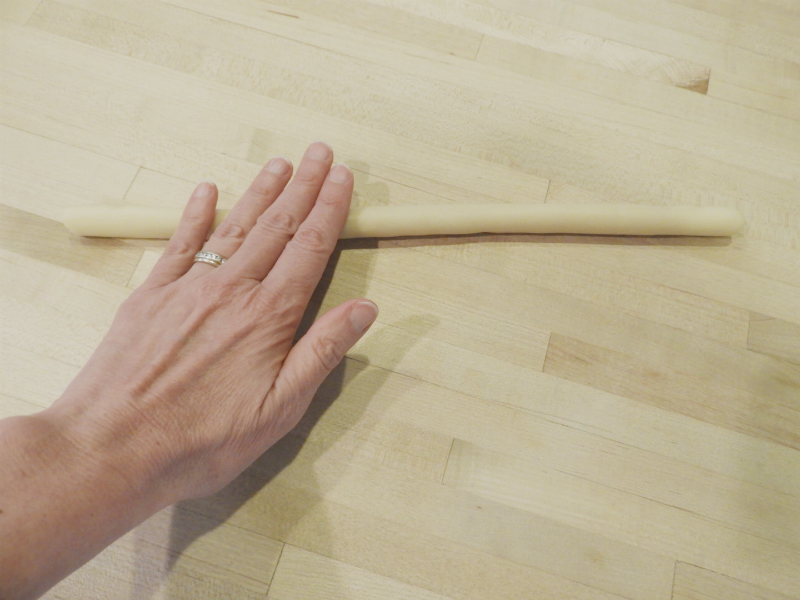
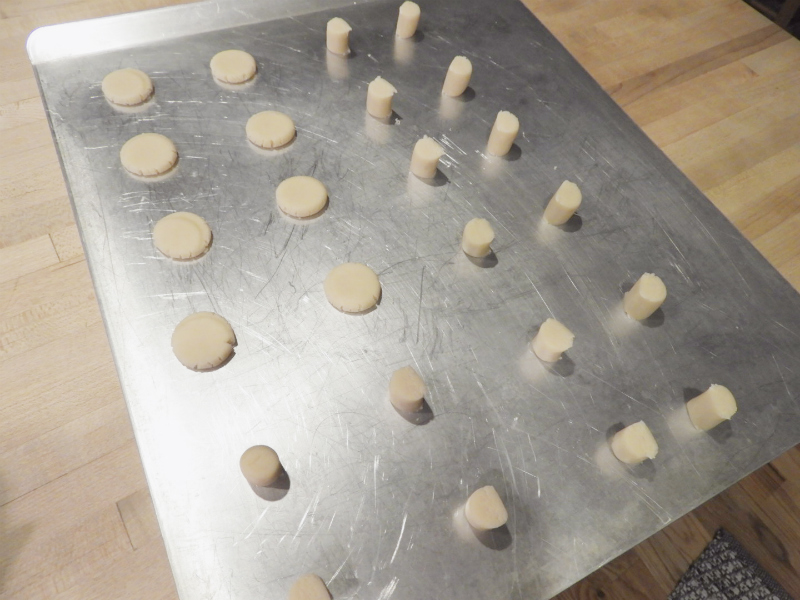
The recipe says to shape the dough into rolls ½ inch in diameter. I ended up making the rolls closer to 1 inch in diameter because the cookies are very small, even with 1 inch rolls.
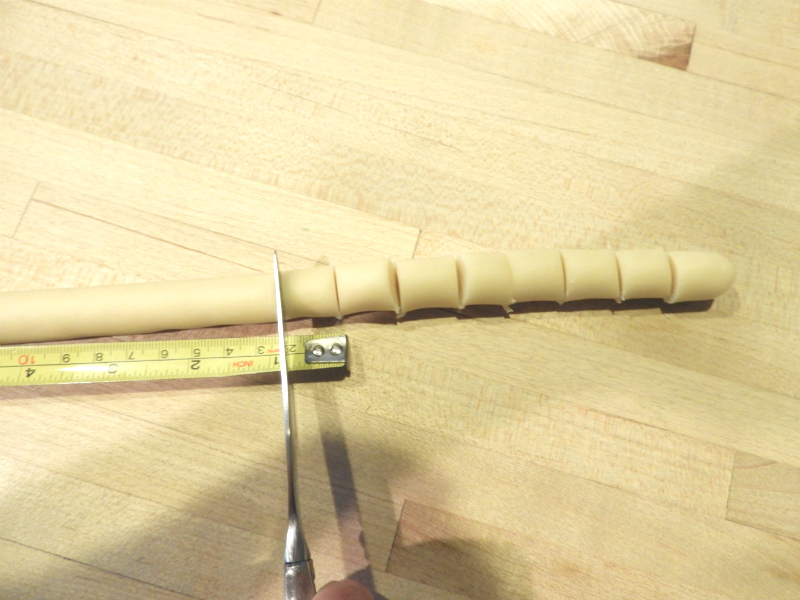
The next step was to cut the roll into ¾ inch lengths. And then place them on ungreased cookie sheets to be stamped.
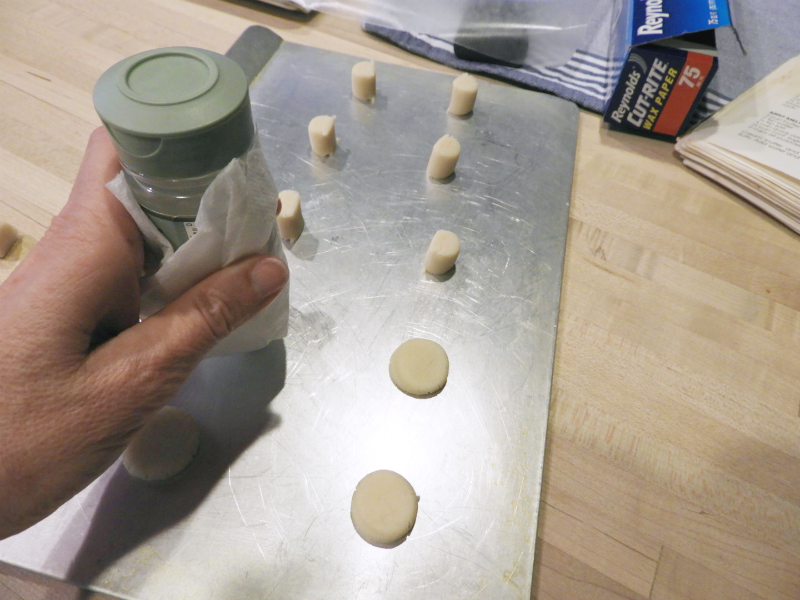
I used a small spice jar and a slightly wet paper towel to stamp/smash the cookies. Thedamp paper towel worked really well, making the stamped cookies consistent in shape and size.
I wasn’t sure how these cookies were going to bake, if they would spread out or stay the same size. I expected them to spread out because the cookies are so small. But they didn’t, they kept their shape and size.
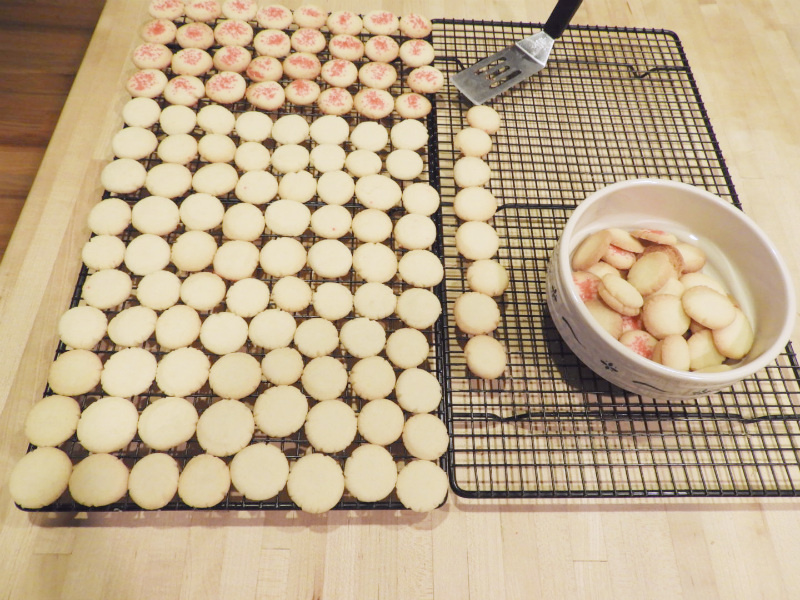
I decided to get creative with the first batch of cookies by sprinkling them with red sugar sprinkles before putting them in the oven. This is a simple way to decorate the cookies and add a bit of sweetness.
As I baked each batch that the cookies, I noticed they were VERY sensitive to the baking time. Not only did I need to watch each batch closely while they baked to make sure they didn’t get too brown, but I needed to remove the cookies from the cookie sheet immediately after taking them out of the oven, or they would continue to bake and turn brown.
My preference is a “just done” or even “just under done” cookie, so the brown edges and bottoms weren’t going to work for me. In the end, I ended up baking each batch for 8 minutes, versus the 10 – 12 minutes mentioned in the recipe, and still taking them off the baking sheet immediately out of the oven or they would still turn brown. My advice is to watch them carefully and be ready to move quickly when they are done baking! Or, if you like the brown edges, you can be a little more relaxed…
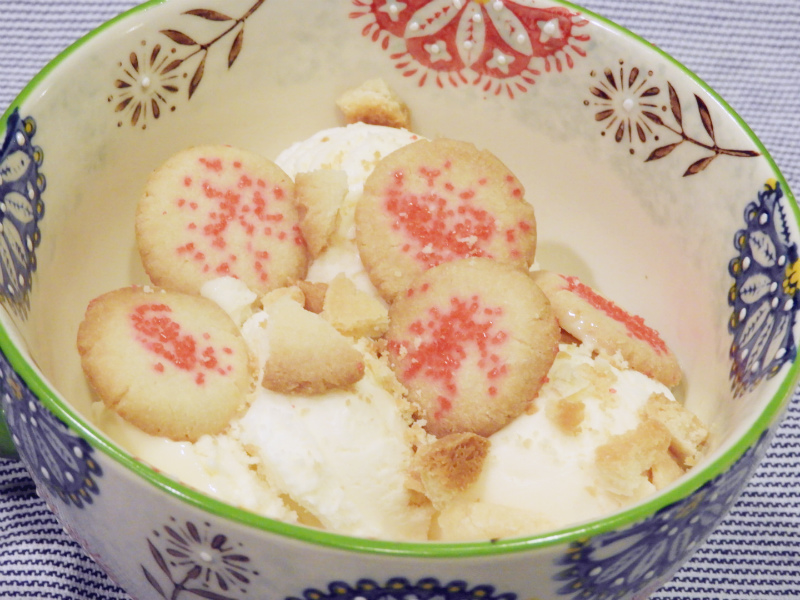
There were a good amount of browned cookies when I was done with the baking. I hated the thought of throwing them away…but not to worry, I figured out the perfect use for these little guys…crunch them up and sprinkle over ice cream! ? I am a vanilla ice cream lover, so that is what I had in the freezer, but these cookies will taste great with any flavor…next time I think I’ll add some hot fudge! What a treat!
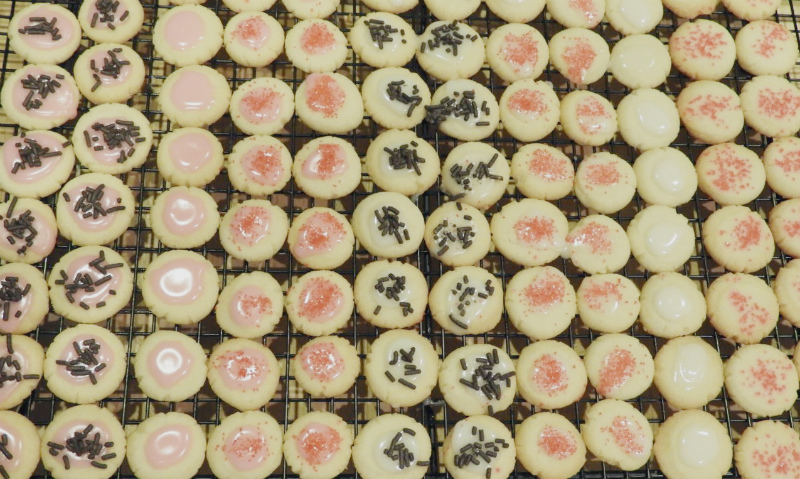
Now it was time to get creative with my decorating! I had all these little disk cookies just waiting to be decorated, so I pulled out my sprinkle set and got started frosting and sprinkling until I had quite an assortment of fun and tasty Valentine’s Day themed cookies.
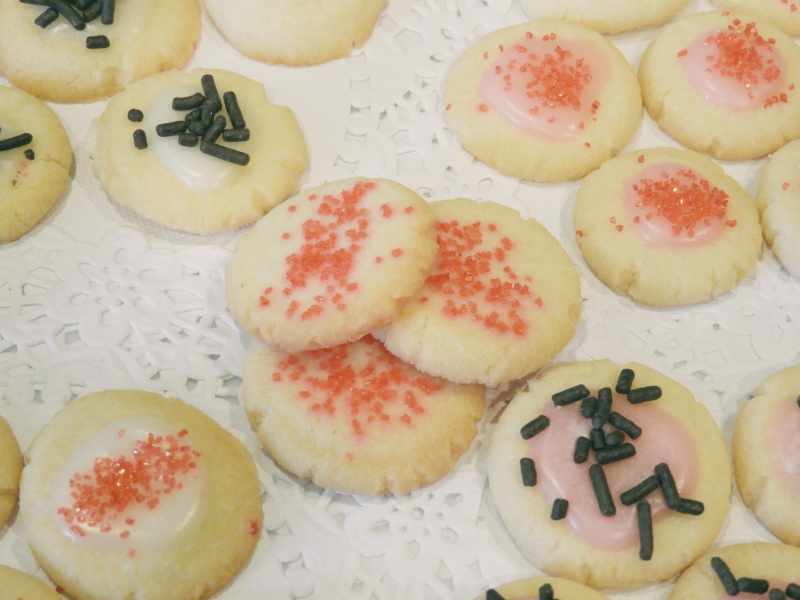

I couldn’t get over how pretty the cookies turned out! And they photographed so well…I had a blast being creative with my decorating as well as my picture taking.
I decorated this batch of Melt Away Yummies for Valentine’s Day, but these cookies will be a crowd pleaser for any occasion. The “yummy” buttery and almond flavor will pair perfectly with any sweet frosting. Or you can serve them plain for a “yummy” traditional butter cookie that will go great with coffee, tea, or ice cream!
Melt Away Yummies
Ingredients
1 cup butter
¼ tsp salt
½ tsp almond extract
½ tsp vanilla
2/3 cups confectioner’s sugar
2 cups flour, sifted
Instructions
Cream butter with salt and flavorings. Add confectionery sugar gradually. Mix well. Blend in flour. Chill. Shape into rolls ½ inch in diameter. Cut into ¾ inch lengths. Place on ungreased cookie sheet. Stamp lightly with a glass that has been covered with a damp cloth. Bake at 400 degrees for 10 to 12 minutes. Frost or decorate as desired.
Notes
Frosting
2 cups sifted confectioner’s sugar
½ tsp mint extract
¼ cup milt
Food coloring
Blend together sugar, milk, and coloring. Add mint flavoring. Mix well.
Recipe Yield
Makes about 8 - 9 dozen 1 inch round cookies 1x
Cookie Category: Molded or Shaped
Cookie Difficulty Rating

JANET … MY VALENTINE .. !!!! You did it again !!!!! Not only do the little buggers look scrumptious .. but .. They taste even better ……and I outta know ……. Keep “bloggin” …. I love ’em ……………………
★★★★★
Thank you dad!! 🙂