Valentine’s Hearts

Valentine’s Day is just around the corner, so I’m thinking about Valentine’s Hearts cookies. I’m thinking about pinks and reds, heart shapes, and hugs and kisses. I’d like to make a cut out type cookie, so I can use my Grandma Bess’s heart shaped cutters. Thank you, Aunt Suzie, for sending me Grandma’s cookie cutters, it’s such a treat to use her tools when I’m baking her recipes!
My normal “go to” recipe when making cut out cookies is always the Rich Flavor Christmas Cookies with the Juice Frosting. But, in an effort to continue trying new Cookies by Bess recipes, I decided to try a different cut out recipe. As I looked through Cookies by Bess, I realized that a lot of the cut out type cookie recipes are listed as Christmas cookies…hence the original name of this recipe…Christmas Trees! ? I am changing the name of this cookie recipe just for the Valentine’s Day holiday…I’ll make sure to make use Christmas tree and star cookies cutters next Christmas season!
Interestingly enough, the only thing that makes this cookie a Christmas tree cookie is the recommended use of tree and star shaped cookie cutters. Super easy fix here! I’m using Grandma’s heart shaped cookies cutters and now calling this recipe Valentine’s Hearts!
I rated this cookie 3-stars because of the time and effort that goes into baking and frosting the cookies. It’s a basic cut out recipe, so nothing you haven’t done before. For me, it was a 5-hour afternoon of baking and frosting before I was done. Totally worth the time and effort because the cookies look and taste amazing! You can always bake one day and frost another if you don’t have the time all in one day. It can also be a great afternoon activity for the kids on a weekend or after school.
Before I even get started talking about the recipe or the baking process, I have to admit, making rolled or cut out cookies isn’t my favorite. They tend to take more time and a lot a patience to roll the dough, cut out the cookies, and frost and finally decorate the cookies. I am always glad I took on the recipe when the cookies are done, because they are always so pretty! This recipe and using the heart cookie cutters was no exception. As I worked through all the steps with this recipe, I couldn’t believe how pretty everything looked. I just couldn’t stop taking pictures! To me, this is what baking cookies is all about…using your own hands to made beautiful cookies to share with your friends and family! Just a warm/huggy feeling!
Okay…on to the recipe and baking process!
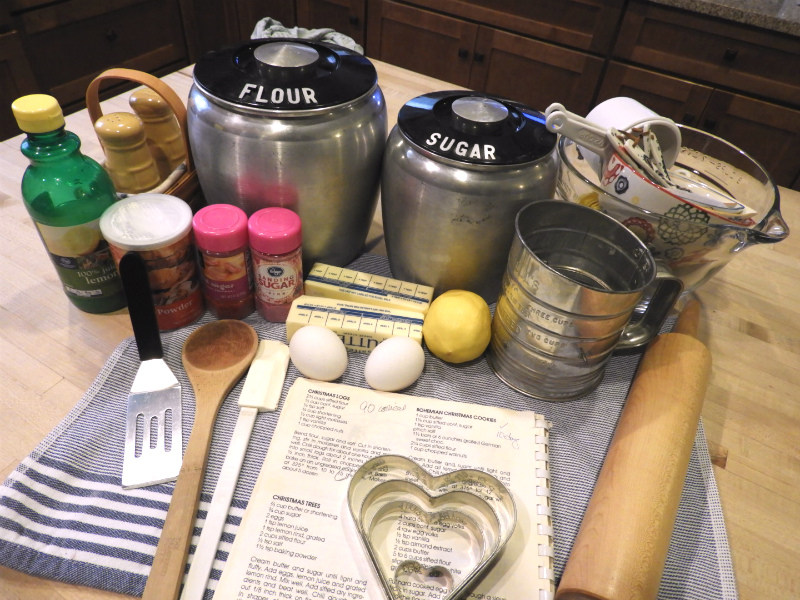
As normal, I got organized and pulled all my ingredients and baking utensils together.
As I mentioned above, this is a typical butter cut out type cookie. I didn’t write any notes about the recipe of baking times as the recipe was true as written.
There is one thing that make this cookie different from other butter cut outs, in such a good way, is the added lemon juice and zest. Wow! What a great surprise when you take a bite of these cookies! The lemon flavor in the cookies works so nicely with the Juice Frosting I decided to use…this is a winner cookie for those of you that like or love citrus flavors!
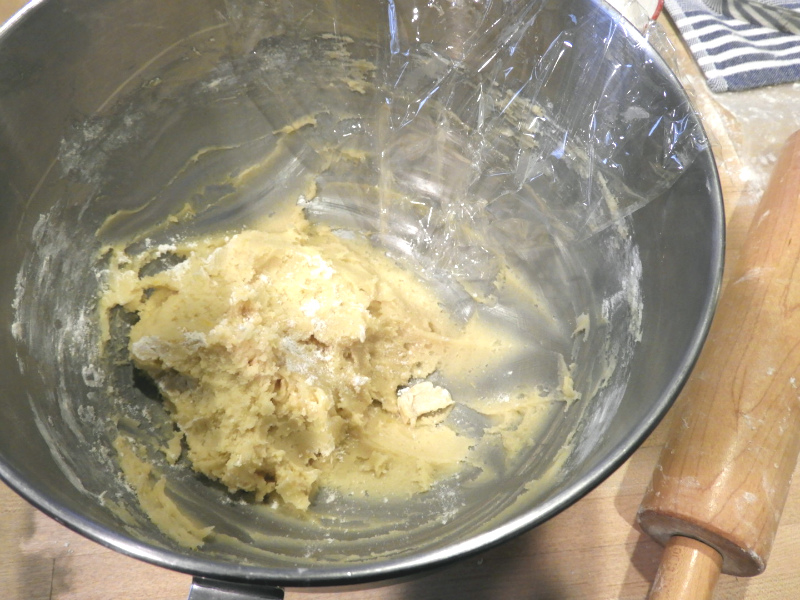
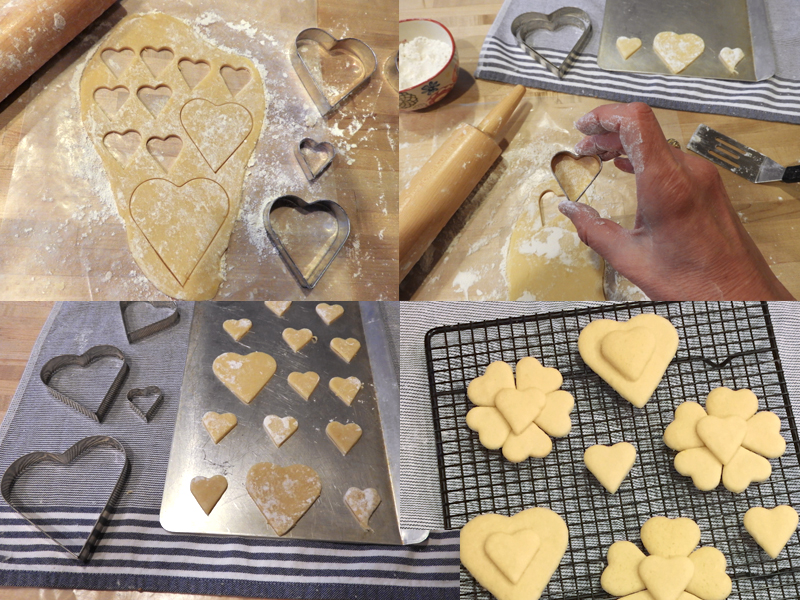
Once everything was mixed together, I noticed the dough was a little sticky for rolling. You definitely want to chill the dough before you start cutting out cookies. I kept the dough in the refrigerator while I was rolling and cutting out cookies to keep it chilled and firm.
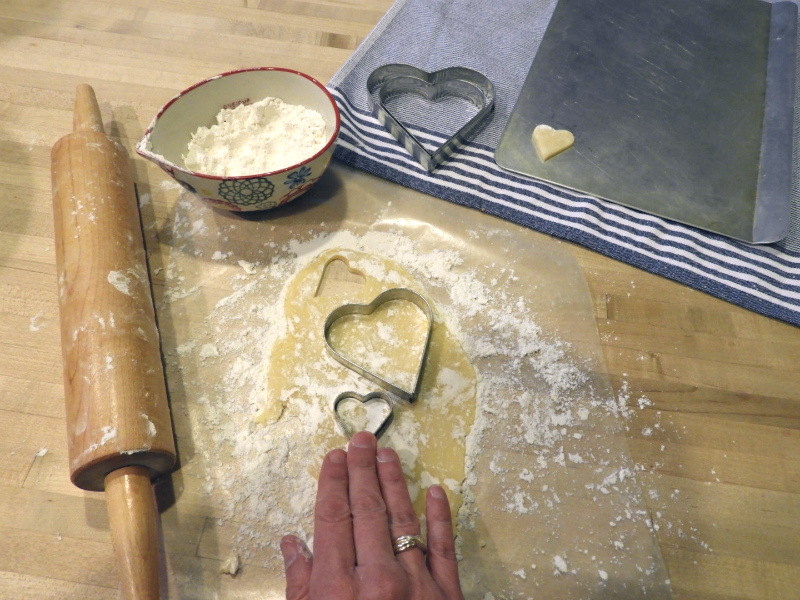
Even with the dough chilled and firm, I still had to use quite a bit of flour to make sure the dough didn’t stick to my rolling pin. I floured my hands when pulling the dough out of the mixing bowl, I floured the wood board before rolling the dough, I floured the top of the dough, and I floured the rolling pin. It helped a lot and didn’t seem to change the consistency of the dough or the flavor of the cookies.
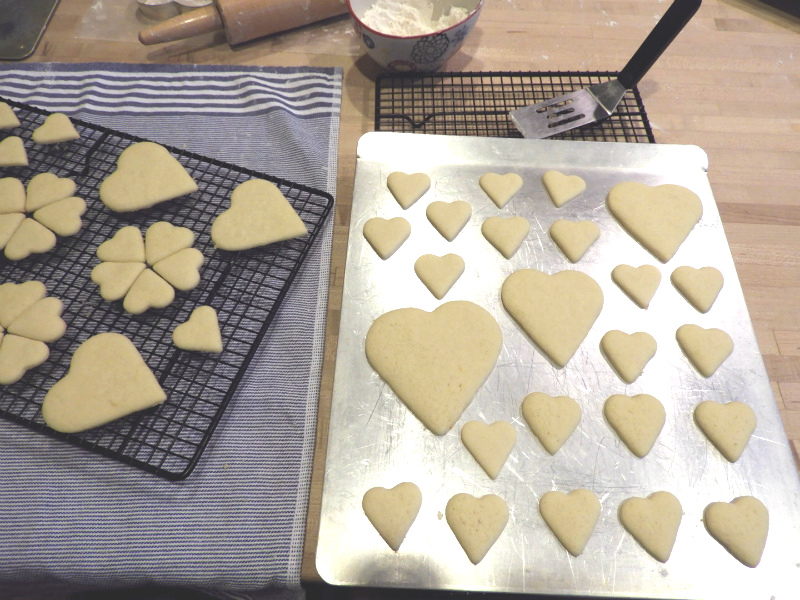
I baked the cookies for 8 minutes to ensure I didn’t get any brown edges or dark spots.
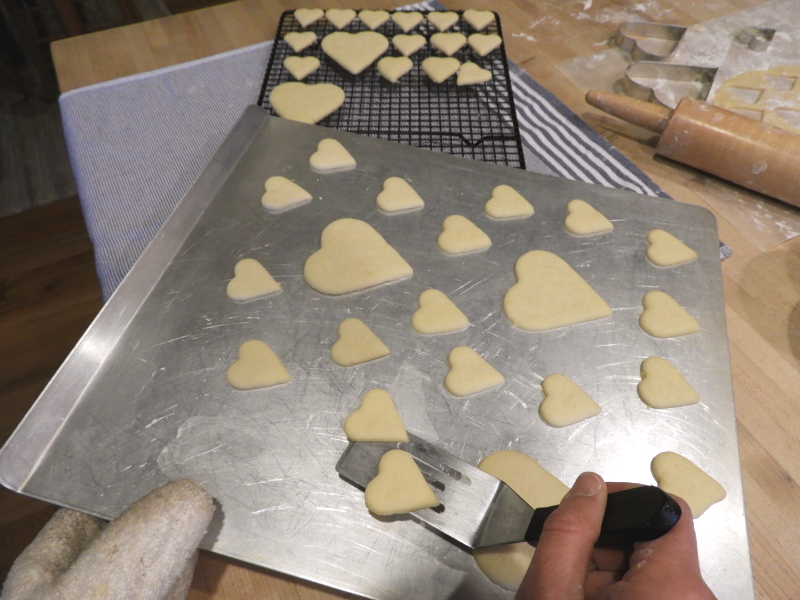
The cookies came off the baking sheets easily whether I removed them right out of the oven or if I let them cool a bit.
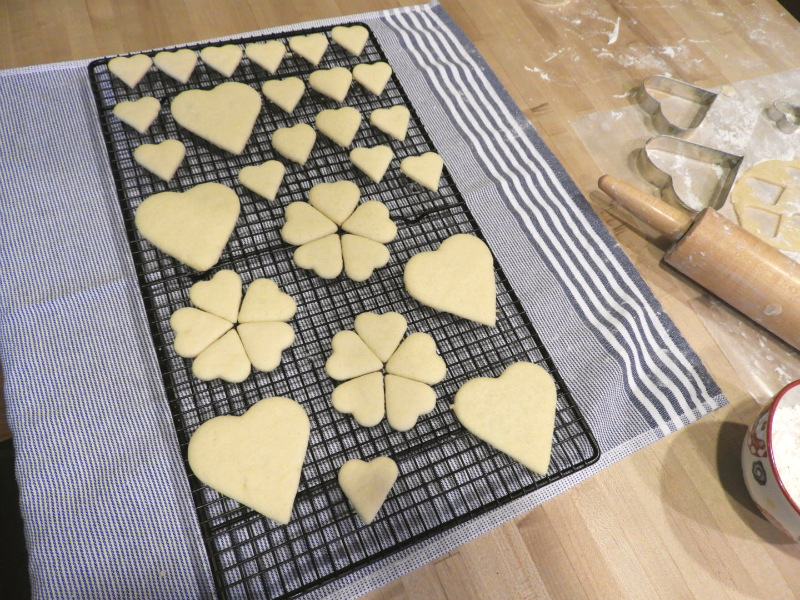
As I mentioned above, I had such a great time taking pictures of these cookies! While I was removing them from the cookies sheets, I kept seeing different ways to arrange them and photograph them. Maybe that’s why it took me so long to finish making these cookies…I probably spent a good hour just arranging and taking pictures! ?
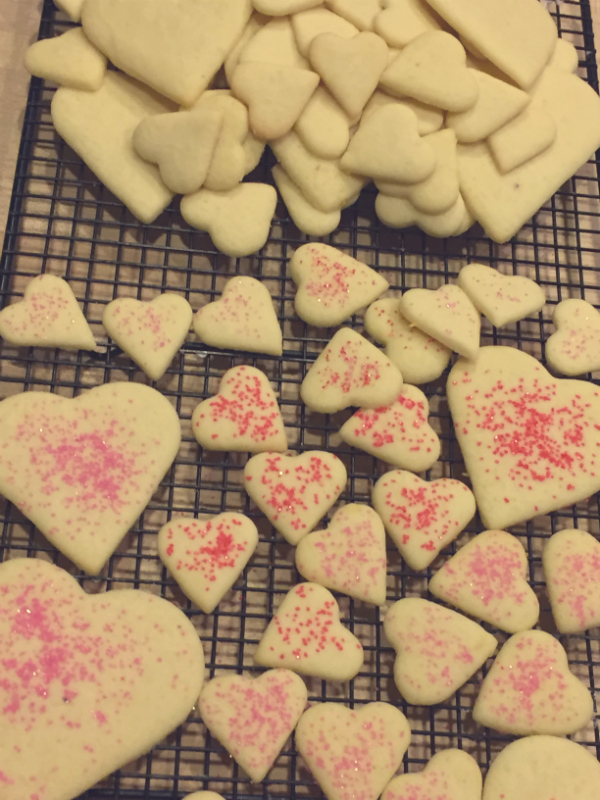
Now that the cookies are all done, it’s time to get creative with my decorating! I remembered just before baking up the last batch to sprinkle some colored sugar on the cookies. They have such natural beauty with just the sugar…and even thought all the cookies are heart shaped, the different types of decorations make it seem like there are different types of cookies. After all, variety is the spice of life!

What more can I say? I had a blast making these cookies and I just love being able to share the finished product with you!
I’m not a professional baker, or as you can see cookie decorator, but I just love how these cookies turned out. Not only do they taste amazing, they look like they’ve been baked from the “heart” …I know, sorry, I just had to say it ?
One of my favorite Grandma Bess quote is shown on our History page…
“I don’t try for perfection when baking with children, because you have to make a child feel important, even if they make a mess. They will feel happier if their frosting isn’t perfect, they’ll say, my mommy did it that way too.”
I’m obviously no longer a child, but I still like the homemade and handmade look of these cookies. They are unique to me and will be unique to whoever is baking and decorating them for their loved one. With kids? What a great way to teach then a fun way to be themselves and to love what they what they create!
I would love to see pictures of your home baked and decorated cookies! Please send them to be by going to our Join the Community page…
I hope everyone has a wonderful Valentine’s Day full of tons of hugs & kisses and Valentine’s Heart cookies!
XXOO,
Janet

Valentine’s Hearts
Ingredients
2/3 cup butter or shortening
¾ cup sugar
2 eggs
1 tsp lemon juice
1 tsp lemon rind, grated
2 cups sifted flour
½ tsp salt
1 ½ tsp baking powder
Instructions
Cream butter and sugar until light and fluffy. Add eggs, lemon juice, and grated lemon rind. Mix well. Add sifted dry ingredients and beat well. Chill dough. Roll out 1/8 inch thick on floured board. Cut in shapes of trees or stars. Brush with slightly beaten egg white. Sprinkle with colored sugar. Bake at 375 degrees for 8 to 10 minutes. Also can be frosted.
Notes
Juice Frosting
2 Tbs butter
1 ¾ tsp lemon juice
2 Tbs orange juice
1 ½ cups sifted confectioner’s sugar
Add melted butter and juices to sugar and mix well. Use food coloring as desired.
Recipe Yield
Makes about 5 dozen depending on the size of cookie cutters used 1x
Cookie Category: Rolled
Cookie Difficulty Rating

These look so delish! Love the different sizes of hearts, that makes them so pretty!
★★★★★
Thank you Wendy! 🙂